8-Speed R2000
Gear Adjustment
TOP ADJUSTMENT
Turn the top adjustment bolt to adjust so that the guide pulley is below the outer line of the smallest sprocket when viewed from the rear.
(A) Outer line of smallest sprocket
(B) Guide pulley
(C) Top adjustment bolt
BOTTOM ADJUSTMENT
Turn the low adjustment bolt so that the guide pulley moves to a position directly in line with the largest sprocket.
(A) Largest sprocket
(B) Guide pulley
(C) Low adjustment bolt
Gear Ratio
Overall Range - 309%
(8-Speed) - 11-34T
For more general information and installation instructions click here.
5-Speed RX-RF5
GEAR ADJUSTMENT
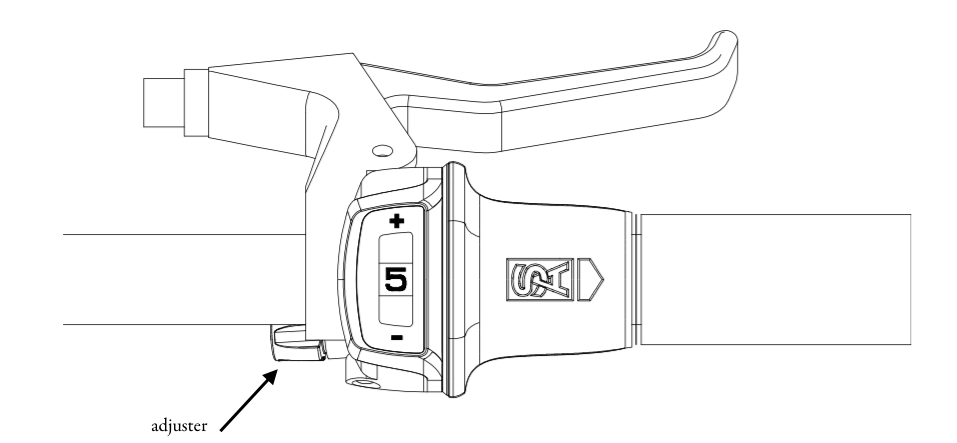
Move shifter from gear number 5 to gear number 2.
Turn the cable adjuster of shifter until the two yellow indicators are aligned with each other.
Re-select gear number 5 and then change back to gear number 2. Rotate the pedal crank a full turn. Check again if two yellow indicators are aligned with each other.
Repeat instructions 1 to 3 if yellow indicators are not aligned.
GEAR CHANGING
Ease pedaling and select the gear required. If the bicycle is stationary simply select the gear required.
GEAR RATIO
• Overall Range - 243%
• Gear 1 | 0.64
• Gear 2 | 0.80
• Gear 3 | 1.0 Direct Drive
• Gear 4 | 1.25
• Gear 5 | 1.56
For more general information and installation instructions click here.
3-Speed RS-RF3
GEAR ADJUSTMENT
Turn Shifter to position “2”.
Turn the adjuster until the yellow guide arrow on the fulcrum lever pulley is in the center of the two guide lines as shown below.
GEAR CHANGING
Continue idling but ease pressure on the pedals and select the gear required. If the bicycle is stationary simply select the gear required.
GEAR RATIO
Overall Range - 177%
Gear 1 | 0.75
Gear 2 | 1.0 Direct Drive
Gear 3 | 1.33
For more general information and installation instructions click here.
5-Speed SRF5(W)
Gear Adjustment
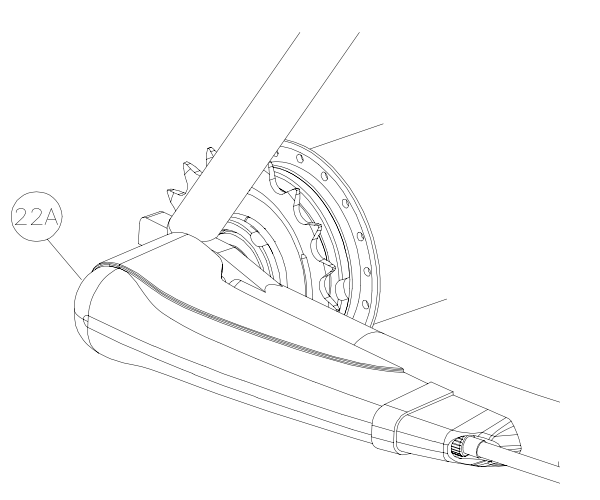
Remove the indicator protection cover (22A) for easier gear adjustment.
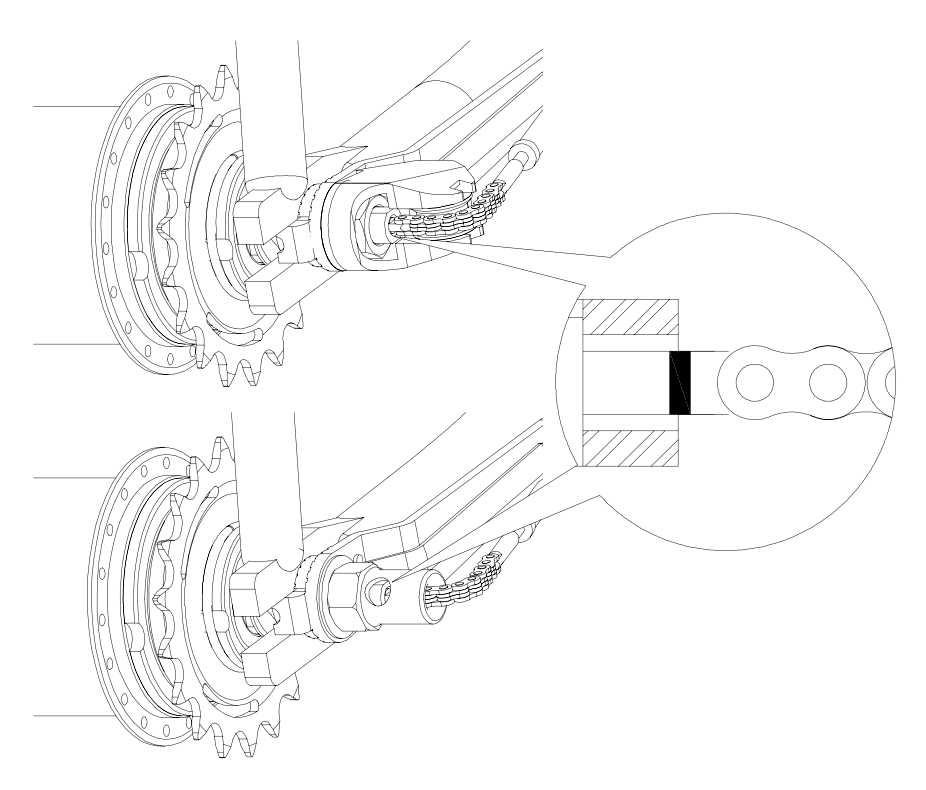
Make sure that no more than 2.5mm of axle protrudes from the axle hex nut.
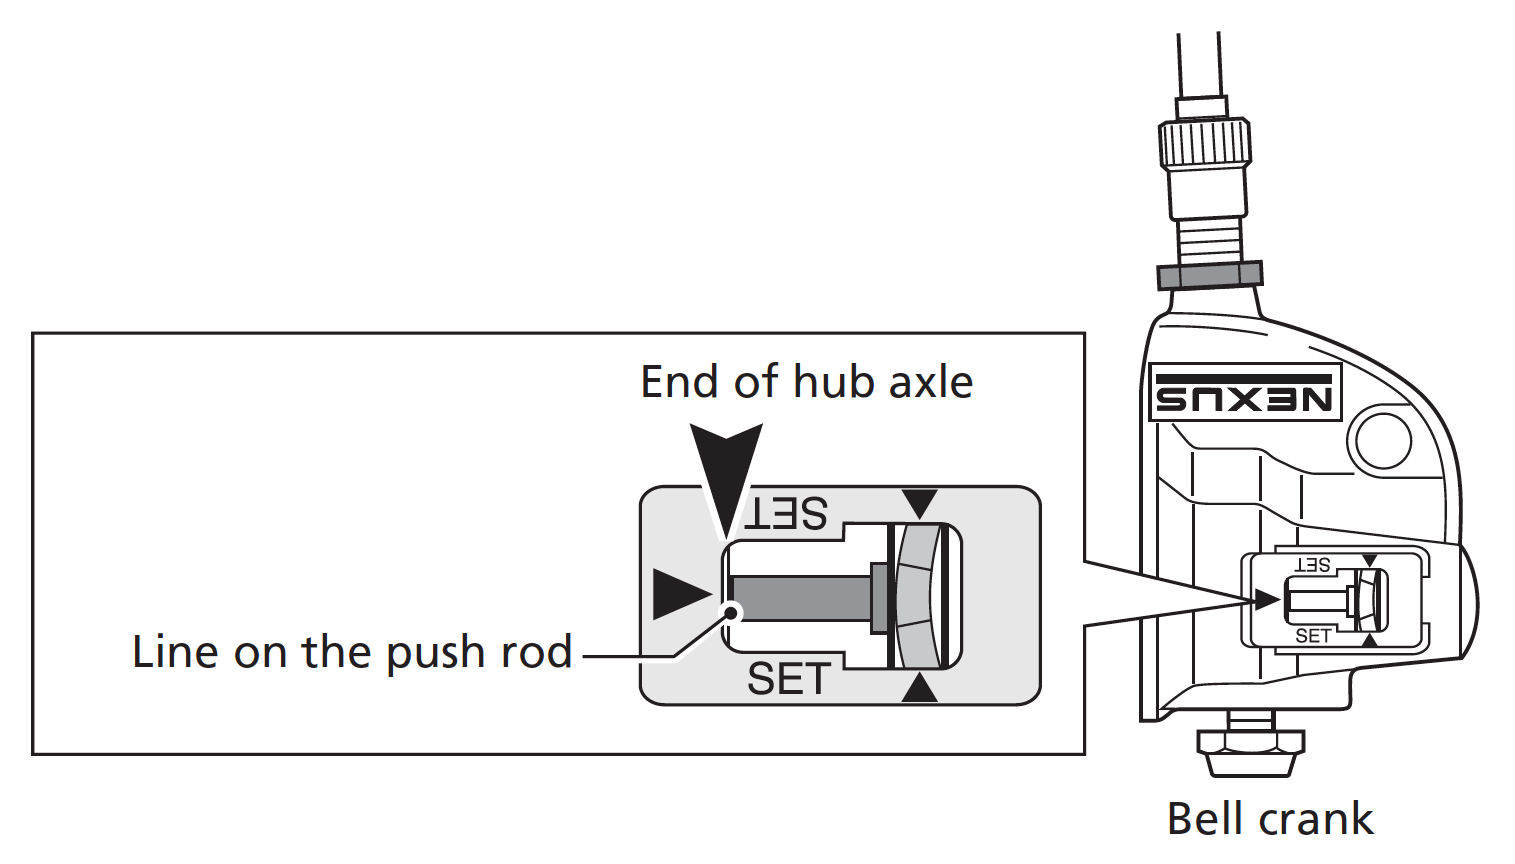
Select 2nd gear and turn the pedal crank forward to ensure the gear is engaged. Turn the cable adjuster (20) or cable connector (19) until the coloured mark of the indicator rod is level with the end of the axle, as shown in diagram.
Tighten the cable-adjusting locknut (20A) and indicator locknut, to lock in adjustment.
Select 5th gear position, rotate the pedal cranks, change back to 2nd gear and check adjustment. Repeat the stages described above when gear changing is incorrect.
Fit indicator cover (22A) back on firmly into the guide nut (21).
Gear changing
Continue idling but ease pressure on the pedals and select the gear required. If the bicycle is stationary simply select the gear required.
Gear Ratio
Overall Range - 256%
Gear 1 | 0.63
Gear 2 | 0.75
Gear 3 | 1.0 Direct Drive
Gear 4 | 1.33
Gear 5 | 1.60
For more general information and installation instructions click here.
3-Speed
GEAR ADJUSTMENT
Select gear number 2.
Loosen the lock nut (10mm wrench) against the body of the shifter.
Turn the cable adjuster until the yellow indicator line centers with the two lines in the window of the shifter.
Tighten the lock nut back against the body of the shifter with the 10mm wrench.
GEAR CHANGING
Ease pedalling and select the gear required. If the bicycle is stationary simply select the gear required.
GEAR RATIO
• Overall Range - 186%
• Gear 1 | 0.73
• Gear 2 | 1.0 Direct Drive
• Gear 3 | 1.36
For more general information and installation instructions click here.


